Menu Option: General: Settings
The Settings screen is used to access all of LEAP's settings. Some of these settings are for the program as a whole; some are settings for individual areas. You can enter notes describing the area as a whole.
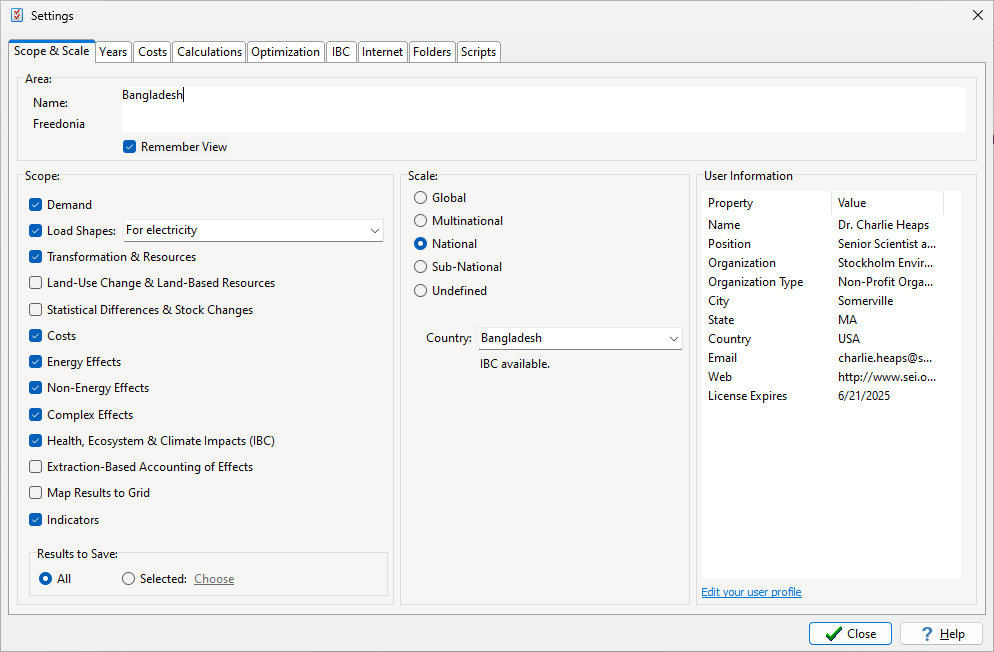
Check Remember View if you want LEAP to save and restore the view and the branch, variable, scenario and region settings between sessions or when switching areas.
The screen is divided into the following tabs: Scope & Scale, Years, Costs, Calculations, Optimization, IBC, Internet, Mapping, Folders and Scripts. Some of these tabs are only visible when certain options are selected on the Scope & Scale tab.
In the Scope box, select which optional analyses to include in your analysis:
Load Shapes: select to examine seasonal and daily load shapes. Both demand and load shapes must be enabled if you also want to examine Transformation and Resources. You can choose to specify load shapes for all fuels, for electricity only or for electricity, heat and natural gas only. When this option is enabled you will see an additional high-level branch named "Load Shapes" after the high-level Demand branch.
Transformation & Resources: select to model energy conversion, transmission and distribution or resource extraction aspects of an energy system. This includes sectors like electric generation, oil refining, charcoal making, hydrogen production, coal, oil and gas extraction, etc.
Land-Use Change & Land-based Resources: Select this option if you want to model resources based on an accounting of land areas by region and by land type and an assessment of the resource productivity per unit of land area on each land type. This is particularly useful when examining the wood fuel demand and supply issues but can also be used for examining wind, solar and other distributed renewable energy resources. This option can only be included if you also select the Transformation & Resource analysis option.
Statistical Differences and Stock Changes: select this option if you want to enter data describing Statistical Differences and Stock Changes. This type of data is particularly useful for ensuring that your historical modeling in LEAP precisely matches published energy balance data for a country. This option can only be included if you also select the Transformation & Resource analysis option.
Costs: select this option if you want to enter data describing the costs of an energy system. This data is used as input to LEAP's social cost-benefit analysis calculations and to its optimization-based calculations. Switching off this setting will hide (but not delete) all cost-related data variables and disable all cost-related calculations.
Energy Effects: select this option if you want to specify emission factors and perform calculations of the emissions associated with energy-sector. Switching off this setting will hide all pollutant branches within the energy sector parts of the LEAP tree and will disable all energy-sector emissions calculations.
Non-Energy Effects: select this option if you want to specify emission factors and perform calculations of the emissions associated with non-energy-related sectors. When this option is enabled, an additional top-level branch will appear in the LEAP tree labelled Non Energy.
Complex Effects: select this option to enter data and include emissions other than the basic greenhouse gases and criteria (local) air pollutants. LEAP has a large database of pollutants including CFCs, HFCs, and other complex chemical pollutants. Leaving this option unchecked makes selection of GHGs and air pollutants easier.
Health Ecosystem and Climate Impacts (IBC): select this option if you want to use LEAP with the add-on IBC module. More information on IBC here. This option can only be selected if you also select the Transformation, Energy Effects, Non-Energy Effects and Indicator options along with a valid country. Note also that using IBC has a number of other prerequisites. See the Using IBC pages for more information.
Extraction-Based Accounting of Environmental Loadings: select this option to switch on an additional optional calculation that calculates extraction-based emissions. This is an alternative approach for accounting for emissions versus LEAP's default territorial-based emission accounting methodology. When this option is switched on, you will be able to create additional environmental loadings below the Resource branches in the LEAP tree.
Map Results to Grid: select this option to enable calculation of the Geographical distribution of emissions and to show the results of these calculations on gridded GIS maps. This option is only available if you have previously installed MapWinGIS (which must be downloaded and installed separately). Once enabled you will also need to set up maps for your area using the Mapping tab on the setup screen and the General: Geographic Mapping screen.
Indicators: select this option if you want to conduct additional analyses and create additional indicators after LEAP's main calculations are completed. When this option is switched on, you will see an additional top-level branch in the LEAP tree labelled Indicators.
Tip: You can temporarily disable parts of your analysis by unchecking one or more of these options. This will not delete any data, but will speed-up LEAP's calculations. For example, you can disable Transformation & Resources and Environment calculations while debugging a demand analysis.
In the Results to Save box, choose whether you want LEAP to save all results (the default) or whether you want only a subset of results to be saved. Choosing the second option results in simpler results screens and slightly faster calculations. If you choose this option, use the General:Results to Save screen to edit which results should be saved.
In the Scale, box select the Area's scale (global, multi-national, national or sub-national) and (for national and sub-national areas) select a pre-defined country name. Doing this can be useful if you wish to share your data set with other users via the LEAP web site because it will allow the data set to be searched for by other users. Selecting a pre-defined country is required when running LEAP with the IBC impact calculator extension for a national-scale application, since IBC makes use of this setting to properly select the country for which air pollution transport and impacts are modeled. If using IBC for a multi-national application, you can specify the countries via the Regions screen.
The User Information box displays data about your account on the LEAP web site (if you have registered LEAP online) and provides a link to let you edit your profile on that web site.
Use this tab to set the Base Year, End Year, First Scenario Year and various other important milestone years for your analysis. The Base Year corresponds to the first year for which you have data. The End Year is the final year of the analysis (the last year calculated).
In some cases you might want to specify a time-series of historical data in Current Accounts (e.g. using an Interp function) and then have the scenarios start in a later year. For example imagine you have historical data for 1980-2010 and you then want the scenarios all to run from 2011-2040. In this situation, the Base Year would be set to 1980, and the First Scenario Year to 2011. Now, when LEAP gets results for scenario years it uses the Current Accounts expressions for the years from the Base Year to the year before the First Scenario Year (1980-2010) and it uses the Scenario expression for the years from the First Scenario Year onwards (2011-2040). By default, First scenario year is set to the year after the base year. Note that Growth functions used in scenario expressions will be applied to make values grow exponentially from their values in the year before the First Scenario Year.
Set First Depletion Year to indicate the first year in which resource reserves are depleted by the primary consumption of fuels calculated in LEAP. Normally this should be set to be the same as the base year. However, if your consumption data includes past years of historical data (e.g. 1970-2006), but your reserves data is for some more recent year (e.g. 2005) you should set this to a more recent year.
Set Last Year to Count Costs to indicate the last year in which LEAP will do cost-benefit accounting. This can be any year after the base year up to and including the end year. Any costs after this year are ignored.
LEAP normally performs annual calculations for each year from the Base Year to the End Year. Set the Results Every value if you only want to calculate costs every X years, This value must be set to 1 (every year) if you want to perform cost and stock turnover calculations.
Tip: to speed-up your calculations when debugging your analyses, you can temporarily specify fewer years for your analysis by reducing the end year or calculate results every 2, 5 or 10 years. This will not affect any data you have entered. See also: Tips on Speeding-Up Calculations
Use this tab to set various calculation settings. Most users will NOT need to change any settings on this tab.
Show Calculation Progress: (Always, Never or Only for Large Areas): Use this setting to control whether a progress box appears during calculations. Displaying a progress box will slightly slow calculations.
Iterative Calculations: Use these options to set the maximum number of iterations and the convergence criteria for Transformation calculations. Transformation calculations will iterate to allow for "feedback" energy flows. For more information refer to Calculation of Systems with Feedback Flows. After each iteration, residual requirements are left over (the requirements for fuels consumed in the lower modules but produced by the higher modules). To properly account for these requirements, these residual requirements are added to the original energy demands and the calculation is repeated. This repeats until the change in all residuals is less than the specified fraction of the total residuals for all fuels (by default 0.1%), or until the residuals are less than the specified absolute amount (by default 10 GJ), or until the maximum number of iterations is reached (in which case the calculation is deemed to have failed. Typically, setting larger convergence criteria will result in fewer calculation iterations but a less precise solution. Note that there is no guarantee that all energy systems will converge, particularly if the feedback flows are a large fraction of total energy flows.
Allow growth rates on percent shares: (default=off): We suggest leaving this setting off since applying percentage growth rates to values that are already expressed as percentage shares is at best confusing, and at worst liable to lead to share values exceeding 100%.
Allow references to results in Expressions (default=off): You can optionally create expressions that reference lagged values created during LEAP's calculations. Any calculated results can be referenced lagged by one year, using the PrevYearValue expression function. Enabling this option causes slower calculations, so if you do not require lagged results leave this option unchecked for faster calculations.
Allow efficiencies greater than 100% (default=off). By default LEAP expects energy efficiency values to be between 0% and 100%. You may need to relax this upper bound when modeling heat pumps.
Do not check that share values sum to 100% (default=off): We strongly suggest leaving this off, otherwise LEAP will stop doing important tests to ensure that all neighboring share branches sum to 100%.
Allow code completion (Default=on): Turn this off to disable the auto-complete popup dialog boxes in the Expression Builder that help you to write branch/variable references and in the Script Editor that help you to include LEAP API objects in your VBscripts.
Disallow growth rates Over a % value: (Default=off): Enable this option to do extra error checking on the parameters passed to the Growth function in LEAP expressions.
Allow duplicate neighboring branch names (Default=off). By default LEAP does not allow any branches in a group of immediately neighboring branches to have duplicate names. That is, by default all LEAP fully qualified path names (such as Demand\Household\Lighting\Electricity) must be unique. LEAP checks for this during each calculation and any duplicate names will cause LEAP's calculations to halt, putting you back at the branch where a duplicate was found so that you can rename a branch or otherwise fix the problem. You may choose to allow duplicate names to preserve compatibility with older LEAP data sets in which this rule was not enforced.
Disallow growth rates over [specified]%: (Default=on). Keep this option switched on to help catch situations where growth rates are implausibly high.
Allow non-time sliced variables to refer to time-sliced variables (Default=off)
Allow Trade Among Regions (default=off). This option, which is only relevant in multi-region models is used to control whether there will be endogenously calculated imports or experts among the regions of an area. When switched off, all imports or exports are assumed to occur with the wider world. Switching the option off, allows LEAP's calculations to handle each region independently. Thus if you make an edit to one region in a single scenario, only that single region/scenario will typically need to be recalculated (unless other regions or scenarios inherit their expressions from that region/scenario). When switched on, you can specify imports and exports among regions of an area, using two different methods and making use of the Regional Import Fraction, In-Area Import Fraction and In-Area Export Fraction variables.
Top-Down Sales and Stock Data: If you are conducting stock turnover demand analyses , your sales and stock data can be entered in one of two ways:
Bottom-Up: in which you enter data for each individual technology. With this approach, you will only be able to see total stocks and sales for higher level aggregation categories in the Results View.
Top-Down: in which you enter total sales and stocks at the top level branches and then enter shares of stocks and sales in lower level branches.
Use this tab to specify the scope of the cost-benefit calculations in LEAP. This tab is only enabled if Costs are checked on the Scope & Scale tab.
Cost-Benefit
Calculation Boundary: LEAP allows you to specify a costing boundary:
the Transformation module
after which costs associated with energy conversion and extraction are
no longer counted. Specifying a limited boundary that does not encompass
all modules, can be useful for modeling systems in which you only have
data on the costs of fuels as they are consumed, and you do not have data
on the costs of upstream technologies such as oil refining and coal mining.
For example, you might specify the boundary as electricity production.
This means: a) that LEAP will not consider capital and O&M costs for
upstream activities (modules) such as oil refining or coal production;
and b) that costs will be applied to the feedstock
fuels delivered to electricity plants (e.g.,. diesel) rather than to the
resources (e.g. crude oil) from which they are produced.
You have two basic options:
Full system costing.
This approach draws the boundary around the entire Area and counts costs for all modules. Fuel costs will be counted in terms of (1)
the cost of indigenous resources extracted within the area,
(2) the costs of imported fuels and (3) the revenues from
exported fuels. All Demand and Transformation capital and
operating and maintenance costs are considered. This approach
does NOT include the costs of domestically produced secondary
fuels (e.g. electricity produced in power stations or oil
products produced in refineries), thus avoiding double counting
any benefits that accrue from (for example), saving electricity.
A drawback of this approach is that it often difficult to effectively
capture the costs of certain activities such as oil refining
or coal mining. Capital and operating and maintenance costs
of these activities are often difficult to obtain, and it
is often difficult to determine the economic value of primary
resources in the ground such as coal and natural gas. Moreover,
market prices are commonly used reflect costs after resource
processing and conversion, such as delivered coal or natural
gas.
Restricted costing
boundary. To address these issues, you can draw a more
restricted benefit-cost boundary around your energy system
by nominating a particular module where the costing boundary
is drawn. LEAP then counts the costs of all fuels delivered
to the system measured up to that point. The costs of fuels
delivered to the module at the costing boundary will be used
(delivered fuel costs), rather than the indigenous resource
costs, In addition LEAP also counts the costs of any fuels
imported into the system or any fuels exported from the system,
so long as those imports or exports occur downstream of the
costing boundary. Transformation capital and operating and
maintenance costs are only counted for those modules within
the boundary. All demand-side capital and operating and maintenance
costs, and all environmental externality costs are included,
just as in the complete system boundary method.
With this method, you may find that the costs of imports and
exports do not match up with the physical amounts of fuels
imported and exported. For example, the reported total costs
of importing a fuel may be less (e.g. $4000) than the product
of the imported fuel cost (e.g. $50/ton) and overall import
levels (e.g. 100 tons). This is because some imports (e.g.
20 tons) may occur outside the costing boundary.
Environmental Externality Costs: Check this box to select whether or not to include externality costs in your costing results. Externality costs for different pollutants are entered on the General:Effects screen.
Foreign Exchange Fraction of Costs: Check this box if you want to enter additional data (and then see additional results) describing how each cost is split between domestic versus foreign exchange.
Capital Cost Annualization Method: Select a methodology for spreading capital costs out into a series of future payments. The default method is a simple Capital Recovery Factor (i.e. a standard mortgage formula). This method is required when using optimization to calculate capacity expansion in a scenario. Other methods include: straight-line and sinking fund depreciation as well as no annualization (i.e. assume total capital costs are borne instantaneously).
Discount Rate: Enter the discount rate to be used in the study, and which is used to calculate the overall Net Present Value of each scenario. Note that LEAP's costing calculations are all performed in real currency units, but results can be displayed in both real (constant) and discounted currency units.
Inflation Rate: In addition to showing cost results in real and discounted currency units, LEAP can also show results in inflated (i.e. nominal currency units). LEAP calculates nominal results by applying the inflation rate entered here.
Use this tab to review and set up optimization settings. The screen has three options:
Emission Constraints: Use this option to enable or disable the inclusion of emission constraints in your calculations. If this option is enabled, an additional top-level branch will appear in the LEAP Tree labelled Effects. You can add branches below the Effects branch to contain emission constraints for different effects (pollutants) and use the Annual Emission Constraints variable to specify maximum permissible emissions for each pollutant.
Keep Intermediate Results: Use this option to control whether LEAP saves the intermediate data and results files used by NEMO and OSeMOSYS and your chosen solver. Keeping these files can be useful for debugging purposes and also if you want to use LEAP as a way of generating input files to NEMO or OSeMOSYS. However these files can be quite large and so will cause your LEAP areas to take up more storage space (making them harder to share).
Calculations: Control how you want optimization calculations to display on screen during a LEAP calculation. The options are: hidden; minimized; in window; in window and pause for debugging.
The optimization screen also displays a summary of the optimization frameworks installed (OSeMOSYS is installed along with LEAP, while NEMO must be installed separately). It also summarizes which solvers are installed. OSeMOSYS supports GLPK and CPLEX. NEMO currently supports GLPK, Cbc, CPLEX, GUROBI and MOSEK and XPress. GLPK is installed by default. Cbc and MOSEK are installed along with NEMO (although you must separately purchase and then manually install a license file for MOSEK). CPLEX and GUROBI must be purchased and installed separately from LEAP and NEMO.
The screen also provides a quick link to let you run the Julia environment used by NEMO. This option will likely only be of interest to advanced users of NEMO. Finally, there is an option to reset NEMO. This option will force LEAP to res-can and detect the installed Julia plug-ins used by NEMO. This option is only required when updating NEMO.
For more information, see the Introduction to Optimization in LEAP.
Handling Insufficient Capacity Additions
In some situations, your calculations may result in insufficient capacity being added to meet demands. Typically this occurs if you over-constrain your model, for example by specifying overly-restrictive values for the Maximum Capacity or Maximum Capacity Addition variables. Other model specifications such as including Renewable Targets or Emission Constraints may also cause these problems. Use this box to choose how to handle these situations. You have three choices:
Stop calculations and report an error in LEAP (the default setting).
Continue calculations and create a warning diagnostic message in LEAP.
Stop calculations and report an error in NEMO or OSeMOSYS.
Tips: to allow for handling of these errors in LEAP in options 1 and 2 above, LEAP creates a special behind-the-scenes process named "UNSERVED" with very high capital and variable O&M costs. That process is not visible in the LEAP branch structure: it is only seen by the solver. If a system is otherwise over-constrained, the solver will then tend to built that UNSERVED process. This avoids an error being generated in the solver, but LEAP will report an error or a warning if it sees that UNSERVED process being built. When using option 3, LEAP does not create an UNSERVED process, in which case, if the model is over-constrained, the solver itself will be unable to find a solution and will report an "infeasible solution" error. Option 3 is less user-friendly, but provides more detailed feedback from each solver. Option 3 can also be useful in cases where you wish to explicitly model your own "unserved" process within your LEAP model.
Use this tab to edit special settings for IBC: The Integrated Benefits Calculator. This tab is only visible if the IBC setting is enabled and checked on the Scope & Scale tab. This in turn requires that you have also checked the effects and indicators options. See this page for more information on IBC. There are various settings for IBC:
Enable Indoor Air Pollution Calculations: Check this box to have LEAP calculate health impacts (premature mortality) from indoor air pollution in addition to its ambient air pollution impact calculations. Note that this requires setting up a special calculation structure for cooking within the household sector as described here.
Enable Ozone Impact Calculations: Check this box to have IBC calculate health and crop damage impacts due to ozone pollution. Note that this option is only available for a small subset of countries and so appears disabled for most countries.
Health Impact Relative Risk Functions: Choose which set of relative risk functions are used by default for both the ambient and indoor air pollution calculations. These functions are used to calculate health impacts (premature mortality) based on the exposure calculated in LEAP and IBC. Currently, LEAP and IBC support both the 2014 and the 2017 versions of the functions from the Global Burden of Disease studies (Burnett et al., 2014 and Cohen et al., 2017). For newer studies we recommend using the 2017 functions. However, you may wish to use the 2014 functions for consistency with older studies conducted using LEAP and IBC. For consistency, you are required to use the same set of functions for both indoor and ambient air pollution calculations. However, you can also use different functions in different scenarios as a way of comparing the different results produced by each function.
Base
Year Particulate Matter Scaling: Choose whether and how
to scale base year particulate emissions, to match satellite-based
calculations of the concentrations in a country. If set
to No, LEAP's national
emissions estimates are fed directly into IBC and are used to
calculate base year concentrations (along with additional information
about rest of world and natural background emissions). If
set to Yes, base year
concentrations of particulates are set to national satellite-based
estimates from van Donkelaar et. al 2016.
In this case, LEAP's national base year emission estimates
are not used in setting the base year concentrations. However,
changes in emissions in future years in each scenario calculated
in LEAP are used to drive the calculations of future concentrations
and impacts. It is also possible to use
different particulate matter scaling approaches in different scenarios
as a way of comparing the different results produced by each approach.
If you have use Base Year Particulate Matter Scaling, you must
select a Base Year of
2010 and a First Scenario Year
of 2011. Otherwise, you can use any Base Year and First Scenario
Year. Similarly, if you use PM Scaling, you should ensure that
your LEAP model provides a comprehensive accounting for the national
emissions of all major pollutants. If you are not using
PM Scaling, it is acceptable to only provide a partial accounting
for national emissions. However, due to the non-linearity
of the relative risk functions in LEAP, to ensure they are applied
correctly you must account for at least the majority of national
emissions.
Urban Scale Analysis: This option is currently only available for a very limited set of countries. It allows LEAP and IBC to be used to estimate impacts for two-region models of a country in which one region is a major city and the other is the rest of the country.
Use this tab to configure your Internet connection settings. These settings are primarily used by LEAP when it attempts to check for and download updates over the Internet (the Help: Check On Internet for Updates option).
Passive FTP: You can use either passive or standard FTP. In most cases the default setting (passive FTP) is recommended.
Port (default=21): Specify the FTP port for updates. This is typically set to 21 on most systems. Contact your network administrator to obtain the settings for your network. Please contact SEI if you have problems with updates.
Email: The email options let you specify whether to use the SMTP or MAPI protocols when sending LEAP data sets by email. SMTP has the advantage that no other software is required, but it may sometimes be blocked by firewalls, especially in larger institutions. MAPI sends email by connecting with an email client such as Outlook or Thunderbird.
Proxy Server: If your PC is behind a firewall, you can specify that LEAP communicates over the Internet via a proxy server. Contact your network administrator to find out how to work with this feature. Most users of LEAP will not need to use this.
This tab is only visible if your LEAP area has more than one region or if you have chose the Map Results to Grid option on the Scope & Scale screen. Use this tab to associate your LEAP area with a standard GIS shape file. You will also need to select the field in the shape file that contains the labels to be displayed on the map. Shape files are a standard mapping file format used in ArcView and other GIS systems. Most mapping software is capable of generating and reading shape files. You can also optionally nominate an image file to use as a background for the map (although LEAP can also use background image tiles via the Internet).
For multi-regional LEAP areas, once you have selected a shape file and a label field on this screen, you will then need to establish which shape in the shape file corresponds to the regions in your area. You can do that using the General: Regions screen.
For single regional LEAP areas, you can select a shape corresponding to you area directly from the Mapping tab.
Each LEAP region (or area) should be mapped to one GIS shape. Therefore, you will need to choose a GIS shape file that has the same level of regional disaggregation as your LEAP area. For example, if the regions in your area correspond to countries, then you will need a GIS shape file that is also broken down by country. If your LEAP regions correspond to regions within a country you will need a more disaggregate shape file.
Finally, this tab also allows you to specify the size of cells (in degrees latitude & longitude) for use in calculating and displaying gridded maps. Bear in mind that the smaller the number used here the more grid squares will be generated. Due to memory constraints, there is a limit on how many grid squares LEAP can work with. The 32-bit version of LEAP is restricted to creating and displaying maps with up to 50 by 50 cells. The 64-bit version can create and display maps with up to 300 x 300 cells. We suggest starting with a default resolution of 0.5 degrees.
Use this tab to review and edit the folder used to store LEAP areas. You will need to restart LEAP before any changes made on this tab take effect. Note also, that if you change the location of the Areas folder you will also need to copy your areas to that new folder before restarting LEAP.
LEAP will display but will not allow you to edit the Program folder and the settings folder. These folders are set when first installing LEAP.
You can also create a shared folder on a network drive for quick installation of shared data sets.
Use this tab to control how scripts run on your computer within LEAP. Scripts are typically ".vbs" files that contain code that is executed on your computer.
WARNING: Scripts may contain malicious code that can damage your PC. For example, a malicious script could delete files, infect your PC with a virus, or take control of your PC. You should only allow scripts to run if you received your LEAP area from a trusted source or created it yourself.
The default setting for scripts is that LEAP only run scripts that have been digitally signed by SEI. This provides assurance that a script has not been tampered with by anyone outside of SEI. You can change this setting to provide different levels of script security, ranging from never running any scripts (most secure) to running all scripts without confirmation (least secure- not recommended). If you develop your own scripts for internal use, you may want to choose the setting marked "Run unsigned scripts & require approval before running." If you want to distribute your areas to other users and include scripts within those areas, then we recommend that you first digitally sign any scripts. You can do that using Microsoft's SignTool. You will need SignTool in conjunction with a code signing certificate. These are available from a variety of providers, such as COMODO or SECTIGO. Note that all of the sample scripts included with the areas distributed with LEAP (e.g., in the Freedonia and Asiana data sets) are digitally signed. If you select one of the "Require Approval" settings, LEAP will ask you to grant permission the first time any script is to be executed. It will then add that script to the list of approved scripts to be run for a given area (shown on this screen). SEI-signed scripts that form part of the LEAP & IBC code are always run without needing explicit approval.
Refer to the topic on Automating LEAP for more information about scripts.
Finally, the scripts page also lets you set a time limit for script execution. This can be useful to guard against scripts that lock up and fail to complete their execution a reasonable amount of time.